How we got our Zoom Integration into the Marketplace
Recently we hooked up our CRM product with Zoom so that users could schedule and make calls directly, and our app now has a Marketplace listing. This is a guide for developers who want to understand the process of getting their application into the Zoom Marketplace.
Adding value by including video conferencing
Zoom has always been a well known video conferencing platform and the 2020 - 1 pandemic rocketed it even further into people’s daily lives as people came to rely on it for day to day work and for business meetings.
That change, along with the seismic shift across business on how b2b meetings can effectively run via video conferencing rather than face to face lead us to want to integrate Zoom into our CRM platform.
Our goal in integrating Zoom was to make it easier for our CRM users to connect with their prospects and existing customers. Specifically, they would be able to schedule, notify, manage and join meetings via zoom without leaving their CRM system.
Developing our integration
Like a lot of development teams we prefer to iterate on our features and therefore wanted to start with a Zoom integration that was useful but could be expanded later on based on user feedback. Our app development therefore ended up delivering the following user benefits:
Manage your Zoom connectivity from within the CRM
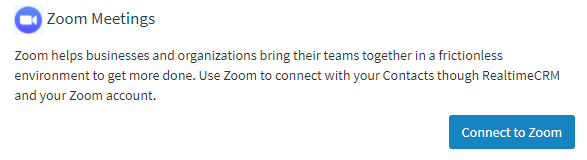
Each user has their own Zoom account and therefore the ability to connect the CRM with Zoom should be at a user level. We wanted that to be done on the user’s settings page where they can already connect with other third party providers such as Xero and Mailchimp.
Schedule a Zoom meeting with a contact
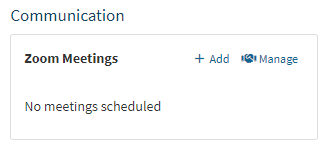
Within our CRM we have a data entity called a Contact which represents an individual. As meetings are always between people it made sense to offer the ability to connect with a Contact. Therefore, once a user is connected, they can opt to add a meeting.
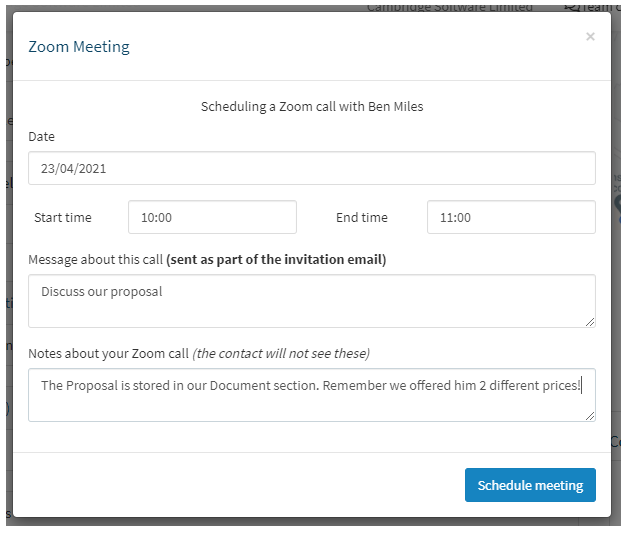
Once the meeting has been scheduled the Contact gets an email with the time, date and a link to join.
Managing Meetings
The user can schedule as many meetings as they wish with each Contact. However, things change so we wanted the user to be able to remove any meeting that wasn’t going to go ahead. We did toy with the idea of allowing them to “edit” the meeting date and time but we shunted that to a v2 feature if people wanted it.
By managing meetings the user can remove it or they can jump into the meeting and start it.
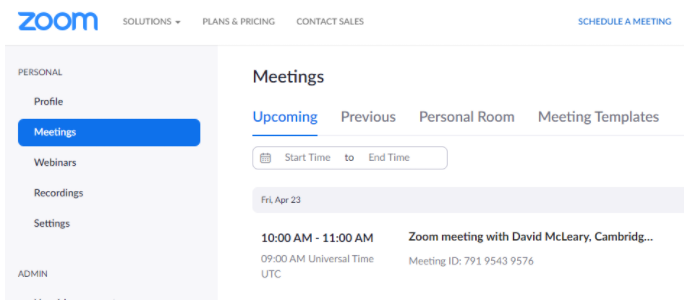
The meeting would also be visible on the user’s Zoom account and while developing it we used this as a test to ensure our end points were working correctly.
Development Methodology
There’s a wide range of approaches that could be used to develop this app. For ourselves, we initially built the integration without any direct Zoom calls. This meant that everything appeared to work for the user but no calls were made to the Zoom endpoints. This allowed the team to collaborate and verify what the user experience would be without having to rewire our integration.
Once we knew that we were nearly there with our integration we started to connect up the Zoom end points. Zoom has some good API docs which clearly list each of the endpoints and the kind of payload each one would have. However, in order to use it you first of all need to spin up an application with Zoom. It’s actually surprisingly easy and starts with the App Marketplace. We’ll cover off the steps in the next section.
With your app in place you’ll get the clientID and ClientSecret that you’ll need to securely store in your own application and send to Zoom when making calls.
Once we had the zoom integration working we then went through the approval process with Zoom which we’ll detail below.
Creating your Zoom application
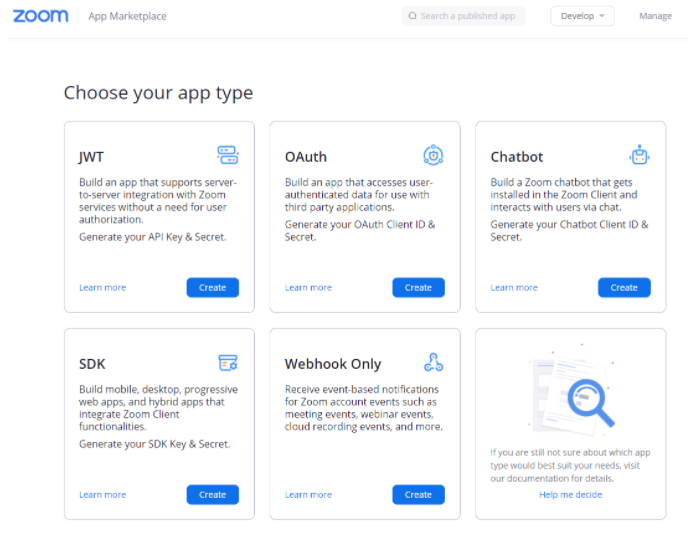
To allow data to flow between your application and Zoom we needed to set up a Zoom application. Signing in to the Zoom Marketplace allows you to click on the Develop dropdown at the top right and select Build App. You then need to choose your app type. We chose an OAuth application because we need our app to access zoom data, authorised with user data. This article is focused entirely on the OAuth approach.
When you choose the OAuth version you’ll be asked some basic questions about your application. Don’t worry about being too precise at this stage, we just needed to create the instance which allows us to complete our local development and then we came back to tidy up and submit it for approval.
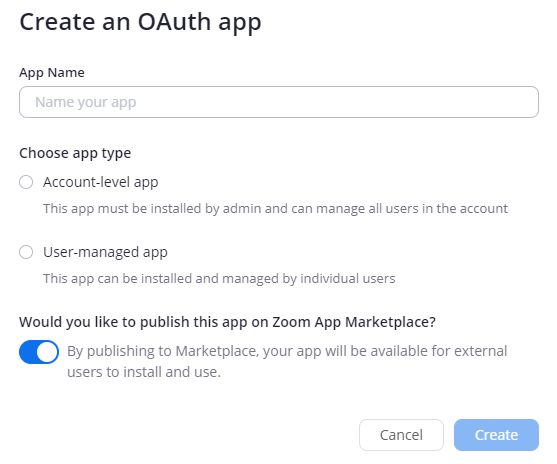
As mentioned previously, the app is entirely user managed so that anyone using our CRM can integrate with it. For user-level accounts you will need the app to be published to the Marketplace so that users other than your developer account can install the application.
Local development of Zoom applications
At the point at which we had the Zoom application created we were by no means ready to go live. However, we did have the all important Client ID and Client Secret which we were able to use to make OAuth calls to the application. This would allow us to wire up our end points, request tokens and monitor the installation and deauthorisation of the app.
One of the challenges that developers face when using OAuth with third party applications is how to test it locally. The answer to this is to use ngrok. This software is free and easy to install (although I would strongly recommend that you register if only to get the unlimited timeout period) and creates a “tunnel” between the URL you are given and your localhost.
Using ngrok you will therefore be able to hook events into https://your-ngrok-name.ngrok.io/ which will work in place of localhost. Specifically, when entering values into the Zoom app for testing we’ll use ngrok paths as you’ll see below.
OAuth calls for our use case
Here is an overview of the calls to Zoom that we made for our use case. Yours will most likely be different but we thought you might welcome the high level oversight of the flow.
Request access /oauth/token When the user accepts a request to connect Zoom to our CRM we pass details of our app to zoom in order to obtain details about the user. We also get the important access token which we’ll use to make subsequent requests.
Get details of the user v2/users/me As soon as we get the initial connection (step above) we request additional information from the user. This allows us to grab their email address (which we display to confirm which account is connected) and their license level (which we use to only request premium services for those with paying accounts).
Refresh token (if necessary) /oauth/token We will call this function with the refresh_token parameter in order to obtain a new access key if the existing one is expired. If the user is still authorised with Zoom then we’ll get a new key.
Create a meeting v2/meetings/ Called with a POST request with details in the payload it allows the meeting that has been added to our CRM to be recorded in Zoom. Importantly, it returns the launch URL for both the initiator and for the participant. We share the latter by email with those invited to join.
Delete a meeting v2/meetings/ This end point is called with a DEL request when the user removes a Zoom meeting from our CRM. It removes the corresponding meeting from their Zoom account.
Disconnect from Zoom /oauth/revoke When the user disconnects their Zoom account we send details of our application to this end point so that the user can be disconnected from Zoom. It’s important that you remove all of the data you hold that you got from Zoom. We remove the entire Zoom connection object that we gathered above.
Confirm data compliance /data/compliance This is an important one and we made the mistake of missing this first time around! Once you’ve handled the Zoom disconnection you need to ping Zoom back with the deauthorisation payload so that they know you’re in compliance with data protection.
Deploying our app
In order for the app to be reviewed by the Zoom marketplace it needs to be accessible to them. To do this we put our app live with a feature flag linked to a specific test account, which we’ll share with the Zoom team shortly. This way we can deal with any feedback without letting our users have access to it.
Once deployment is done it’s worthwhile doing your own verification of the implementation. Although your app can not be installed until marketplace publication has been achieved you, as the developer, can use your credentials to log in and do so.
We used our login to run through the steps of the app from authentication to deauthorisation to ensure everything was in order.
User Documentation
Before we jump into authorising our app be aware that you need to provide some publicly available information to the user. It’s difficult at this point to keep things quiet but we produced the content - accessible via a direct URL - but only linked it to our main site once the approval process had passed.
Here is what you’ll need to get ready and have an accessible URL:
- Privacy Policy
- Terms of use
- Instructions on installing the app
- Instructions on using the app
- Instructions on deauthorising the app
Submitting the App for Approval
Once we were happy the app was in good shape we went back to our Zoom Marketplace and started to work through the steps that we set up previously. We already made a start earlier on in order to get our clientID but this time we can polish it and hit the submit button when we’re ready.
Zoom Marketplace App Submission
To give you an overview of the submission process we’ll work our way down the Zoom App Marketplace screen, which you can find via the Zoom Marketplace and clicking on the Manage option at the top right. Here’s what our (post-acceptance) screen looks like:
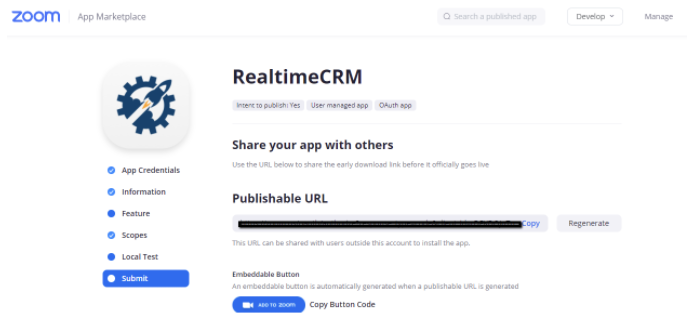
Let’s start at the top and just walk through the various boxes that need explanation:
App Credentials
This is a tab we’ve already seen and pulled our Client ID and Client Secret from before we started. There’s no need to make any changes to those. Indeed, if you do regenerate the secret you’ll need to update the credentials in your own app to match. Best not to do this during the review process!
Redirect URL for OAuth: You will have already needed to set this in order to get your OAuth system working. You need to ensure that it points to your live, production installation as you may have been using an ngrok URL until now.
So far you may be using the Development credentials. When your app gets approval you can swap them out for Production credentials within your settings.
Whitelist URL: Make sure you keep these URLs in step with the URLs that your app uses to make calls. We’ve added our oauth callback and deauthorise path full URLs. Again, you may have been using ngrok for these during development so make sure you update them in line with the other URLs which should be production based.
Information
Don’t skimp on this section. Not only do the Zoom Marketplace review team care about what is written here but it is also an opportunity to get your connected application viewed in the marketplace. Read the guidelines on what to write here - it’s not difficult and it’s easy to get it right if you spend a bit of time on it.
Links: Put the links to the URLs that we mentioned above.
Installing your App: We selected Visit Site to Install because we need to tie it to the user.
Deauthorization Notification: This is important and needs to be a URL that fires a script on your application to disconnect the user. Effectively this means removing their data from the system and firing back that payload to Zoom to confirm that you’ve done that. See the OAuth endpoints that we mentioned above for more information.
Feature
We didn’t use any Feature settings in our application. We may do so in the future where we want to capture an event in our CRM such as the user removing a meeting via their Zoom interface.
Scopes
Be careful with these as the Zoom integration team cares massively about them! Here we’re saying what our application can do to the Zoom’s data. It must be entirely and tightly based on the actions that you take. Certainly don’t just add them all in to cover off everything: If something isn’t required you shouldn’t be asking for permission to do it.
The best advice is to start with no scope and test your code against it. Add in the desired scope and retest for each error that you get.
Local Test
This is self explanatory but it’s worth hitting the Install and Uninstall buttons to ensure everything works before proceeding. Otherwise, there’s nothing that you have to do on this tab.
Submit
Once you are ready to get the Zoom team involved in reviewing your app then you can visit the Submit tab. There are a number of critical checks on this tab so read them carefully and deal with any that are still showing as warnings.
- App icon
- App Preview Content
- App Category
- Privacy Policy URL (Links)
- Terms of Use URL (Links)
- Support URL (Links)
- Endpoint URL (Deauthorization Notification)
- Scope usage description is required
- Redirect URL for OAuth (Development)
You will also be asked to validate the domain. Again, the Zoom team is very helpful in this and you can simply email them proof of domain ownership if you have to. It is quicker though to add the verifyzoom.html file to the domain root if you can as you can be done in just a few minutes by hitting the Validate button.
You will now also need to tell the Zoom team how to test the integration. If an account is required then you can provide them with a free trial URL or Login page URL with credentials.
Finally, agree to the Zoom Marketplace development terms and you are ready to hit the Submit button.
Manual Review
When we were dealing with the Zoom team we found them to be very approachable, professional and quick to respond. That said, it can take a few days for some requests to be turned around so the fewer iterations and tweaks to the application during the acceptance process that you need to make the better.
This is very important when dealing with the next step - the manual review process - which includes an overview of what the app is doing, testing and a security review.
It begins with a Technical Design Document that Zoom will have pre-filled. It’s a 13 page docx document which, although it sounds scary, boils down to a few steps:
Architectural Diagram This sometimes comes as a shock and knowing that this is a requirement from the start is useful. You don’t need to go into too much detail; It is simply to allow the Zoom team to create a mental model of where the data is flowing. Be sure to specify databases and third party applications that the data flows through, if any.
Application Development Questions These questions revolve around the processes your development team has in place to ensure a high quality standard, how you are sharing data with 3rd parties and how you store data.
You will also need to explain all of the Zoom API endpoints you are accessing, and why. This ties in nicely with the architectural diagram above. In a similar way there’s a section where you list the scopes that you are asking for, and why.
We didn’t pass our first iteration for two specific reasons, which we share with you now to make sure you don’t fall into the same trap:
- We over-scoped our application in that we asked for a couple of scopes that were not needed. Be sure, therefore, to only apply the scopes that you need to your app.
- There is a question confirming whether you confirm data deletion to Zoom when a user uninstalls and requests their data to be deleted. In our case we said no because we always delete the data regardless of that flag. However, we should have confirmed back to Zoom anyway so the answer to this question should always be yes.
If you do find yourself needing to resubmit the app then you can visit your Marketplace listing, withdraw the approval request, make the change then resubmit. We found that the process didn’t need to start from scratch again and that the Zoom App ID tied together the various requests nicely.
Final steps
Well done if you’ve made it this far. I hope that, like us, you didn’t find the process too onerous and that this guide helped a little.
There’s a final bit of housekeeping to do before you can launch your Zoom app, but you are nearly there now:
Remove the feature flag
If, like us, you had the Zoom functionality linked to a specific account or hidden behind a feature flag then you need to remove that to allow everyone to use it. We didn’t find any problems in doing this and the app scaled up perfectly well for all of our users.
Set the Production credentials
If you have been using the developer credentials to test the integration then you must swap these out with the production credentials. For us, we retained our development credentials in our staging environments and switched to live for production.
Test thoroughly then release
Even though everything should work well there’s no substitute for manual testing.
Need help with Zoom integration?
Since we drafted that article we’ve been involved in a number of other Zoom integrations and if it’s something your application or system needs then just give us a shout and we will see how we can help.